Cross-validation over replicas
What is a replica?
Replica is a repeated measurement of the same physical sample. In order to estimate true generalization performance of our models, we should keep replicas of a specific physical object either in training or in test set, but never split between both. The reason is, that having very similar examples in both training set and the test set makes perfrormance of our models positively biased (over-optimistic). Our models have seen very similar data in training and thus correct results on such data in the test set do not necessarily translate into good generalization capabilities. By generalization we mean robust performance on entirely unseen examples.
Cross-validation over replicas in perClass Mira
If the replica status is preserved in the scan filenames, we can easily instruct the Cross-validation tool to perform data splitting over replicas not over images. For example, in our poweder data set, the A/B/C... letter indicates a replica of the same physical vial (container).
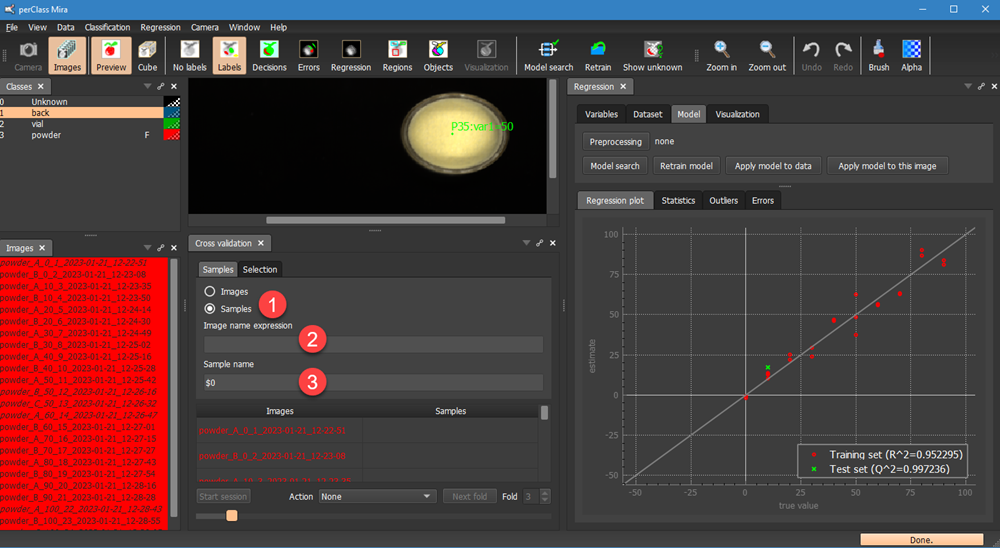
We keep the leave-one-out method selected in the Selection tab, return to Samples tab and change the selection from Image to Samples  . This means, that we may define what consititues are sample for cross-validation. The default is invalid which leads to all selected images flagged as red. We Can now define a regular expression in
  that parses image names and the sample definition in
  that ise used for the cross-valiation.
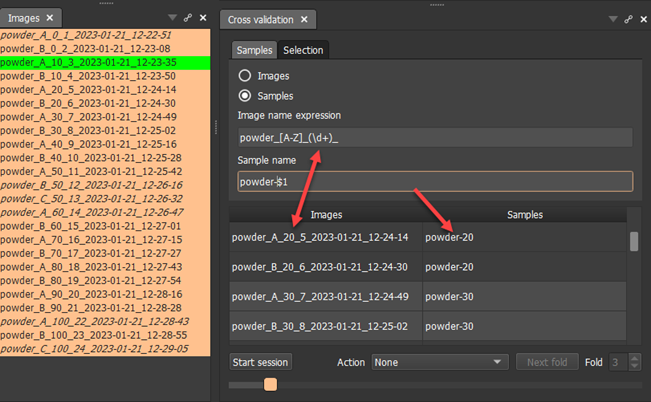
Example solution in our case is to detect the mixing proportion from the file name and construct a new file name that only lists the mixing proportion, nothing else. The reason is that we want to make sure that one vial (i.e. one mixing proportion) ends up either in training or in testing set but not split in both.
Technically, we put in the regular expression that matches each file name allowing for the replica definition using a single capital letter from A-Z range. After the underscore, we capture one or more diits until the unther underscore. The capture (part of a string that will be extracted and avilable to us for reference) is enclosed in round brackets. The \d referes to a digit, the + sign after means that the digit repeats one or more times. This is a standard regular expression syntaxt that is very handy when dealing with structured patterns in strings.
TIP: For a reference information on regular expressions, see https://en.wikipedia.org/wiki/Regular_expression
We also fill the output pattern in the Sample name field above. The important point is that we may refer here to any captures using $1, $2 etc. syntax denoting the 1st, 2nd or later captue (text matched within the round parentheses of the regular expression).
The table shows how original image filename translate into our new definition.
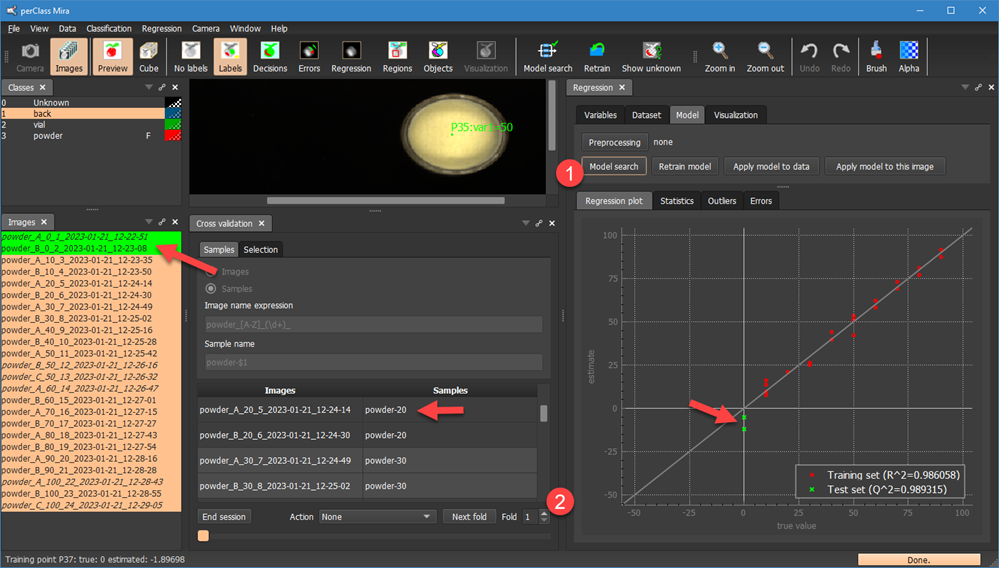
By clicking Start session we can initiate new cross-validation session where we will perform leave-one-vial-out. We also pressed Model search in Regression panel in order to directly see test examples in the Regression plot. Note, that the first fold now covers all replicas of the vial with mixing proportion 0. In our case these are two images.
By selecting a different fold using the spinbox and re-running the Model search, we will exclude all replicas of another vial from training:
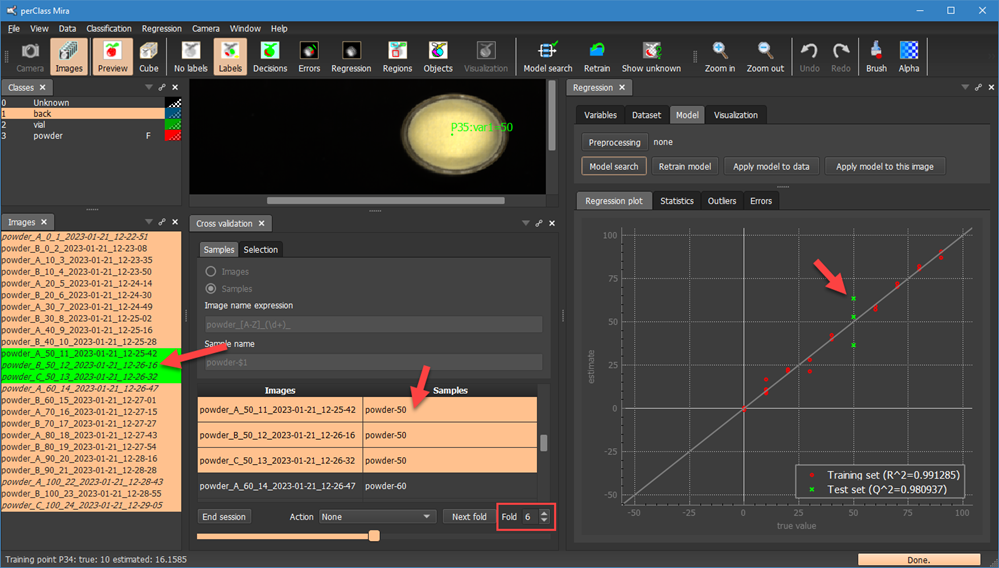
Note, that in the fold 6, we have three replicas of the vial with mixing proportion 60. All three are now in a test set.
For each fold model, we may copy the regression performance from Statistics tab to clipboard, paste into Excel sheet. In this way, we gradually build a table of per-fold results where we will be able to assess statistical variability of each measure.
In this section, we have seen, how to fairly assess performance of our regression model on unseen vials in powder project.