New project
Once the software starts, the New Project dialog appears.
The default Quick start tab allows the user to select three important settings:
- The project type and camera used for acquisition if any camera is available
- The top-level data directory
- The computational device
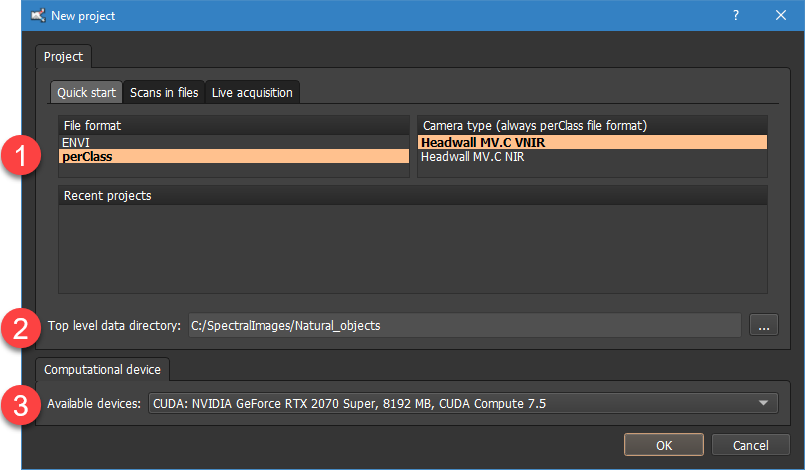
perClass Mira allows the users to either start from existing scans already stored in files or to acquire new scans from an attached spectral camera.
Note, that perClass Mira supports a broad range of project types and many common spectral camera types. You may view all avaialble options in the Scans in files and Live acquisition tabs.
Direct acquisition into perClass Mira always uses the "perClass" project type.This assures that users of all camera types can take advantage of identical and complete work-flows for data correction.
The top-level data directory ➋ defines where all scans are located. It is stored in the project file but can be changed anytime from the Image list context menu.
perClass Mira does not write into the data directory unless the user explicitly asks to (for example when exporting the results). The reason is that data directories are assumed to be read-only so that original data set is not altered in processing.
The Computational device ➌ combo box allows the user to define what computational resource will be used for data processing. Note, that perClass Mira installation comes with two executables: The "perClass_Mira.exe" that is CPU-only and works on any PC and "perClass_Mira_gpu.exe" that offers multiple backends including CPU, NVIDIA GPU and OpenCL CPU/GPU. If no correct GPU drivers are found, the later executable may not be able to start.
TIP: In case you experience crashes or very slow operation when using a GPU, please update your GPU drivers to the latest available. For most users this resolves the issues.