Recording references
In order to interpret spectral images, it is highly recommended to correct the raw data from the sensor into reflectance. This operation makes the data robust to illumination changes and thereby makes the interpretation models more generally applicable.
Reflectance correction is based on two reference scans, namely the "white" reference corresponding to the highest reflection we're considering and the "dark" reference defined by the noise of the imaging sensor.
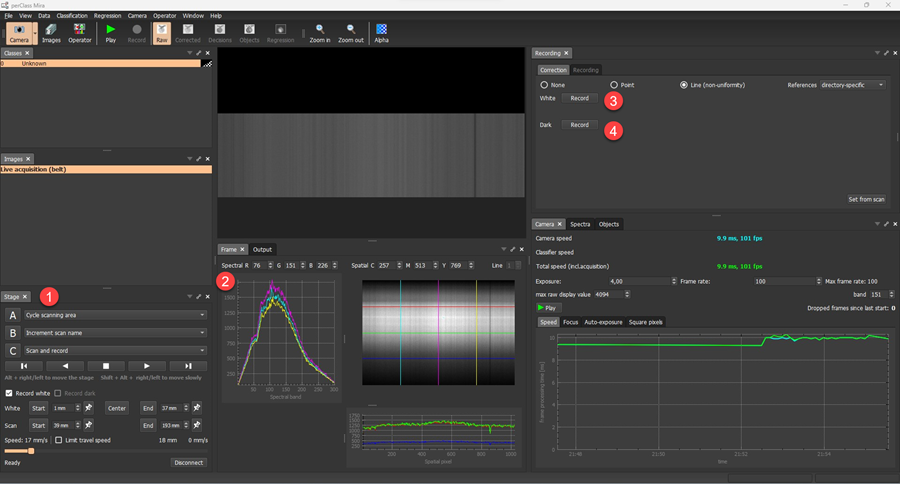
 We will first move the scanning table to the white reference bar. There are several ways how to move the stage. The easiest is to use the Alt + right / left keystrokes. We can see actual raw data from the image sensor in the Frame panel
Defining the position of white reference bar
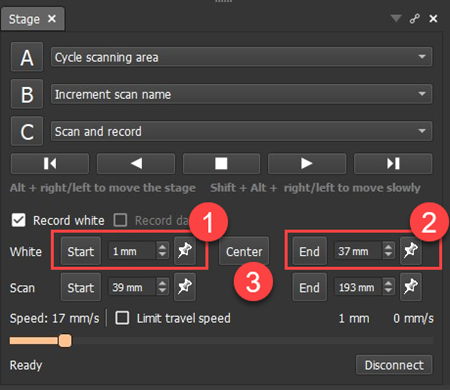
The recommended best practice is to move to the start position on top of the white reference and fix this white start in the Stage panel. It is important that the entire field of view is fully occupied by the white reference. In order to fine-tune the position, we may move at slow speed with Shift + Alt + right / left keystrokes. We can use the pin button to fix the position.
Similarly, we will fix the white end .
We can then move to the center of the white reference by pressing the Center button 
Alternative ways to move the stage are:
- Using the dedicated movement buttons
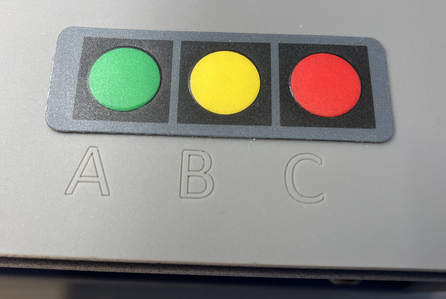
- Via Stage A, B and C buttons. We may assign specific movement commands in via the respective combo-boxes in the upper part of the Stage panel
TIP: You may define the most useful commands for your scanning work flow in the A,B,C command combo boxes. The choices are stored in mira.ini file and are available for future software sessions.
TIP The keystrokes to invoke A, B and C stage buttons are the bottom three numerical pad keys: the "digit 0", "the decimal dot" and "Enter key". This allows one to easily invoke stage buttons via keyboard without looking.
Acquiring references
Once we are on top of the white reference, we can acquire it by pressing the Record button in the Correction tab or the Recording panel.
Because MV.C VNIR camera does not have integrated shutter, we need to cover the optical lens before acquiring the dark reference using button . For other hyperspectral cameras, such as Headwall MV.X, MVC.NIR or Specim FX, the integrated shutter will be closed automatically before aquiring the reference.
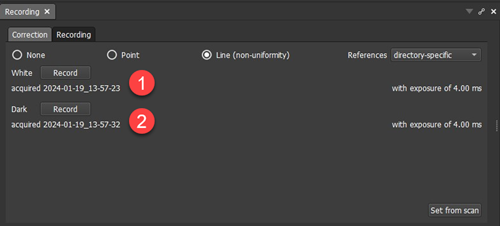
The time stamp and exposure used when recording the references is displayed in the Recording panel.
TIP After acquiring references, the Output panel of perClass Mira lists the min, max values and the mean and standard deviation statistics across all bands. This helps us to easily spot common errors such as shifted/inhomogeneous white reference or not fully closed shutter when acquiring the dark reference.
Once the references are acquired, we may switch to the Corrected stream visualization in Camera mode.

TIP: If you change camera exposure, you need to retake the references. Difference in acquisition and reference exposure is indicated by red color of exposure value to be easily spotted.